During the summer, the Innov8rz held several online courses per week about various robotics topics including WeDo, EV3, Intro to Design, Advanced CAD, Intro to Java, and Python.
I participated in teaching and developing the curriculum for the WeDo, Intro to Design, and Advanced CAD courses.
WeDo Course:
With the WeDo course being the first course and teaching younger kids as well, we learned many things along the way. For making the curriculum, we had to add many pictures and diagrams, labeling them and making the content on the slides minimal and to the point as to not confuse them. We also planned many demonstrations and walk-throughs so that it was more hands-on and interactive so they wouldn’t get bored. We also wanted to make the class experience as simple as possible, such as not having a Google Classroom, unlike our other courses, and not giving homework as well.
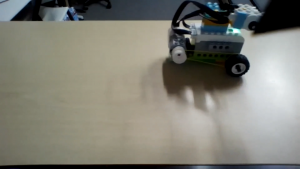
 When the actual course started, we learned different things about the students while teaching as well. For example, we included a separate camera so that the kids could see their code running in real-time, as shown to the left, and if there were any errors, they could see what was going wrong and fix it. Another thing we learned was that some of the students were more advanced, so we switched them into another course that best suited them. We also learned to ask them questions and assign specific people to answer them so that no one felt left out. As the days went by, we changed the curriculum daily to suit it toward what the students had trouble with, and more demonstrations and diagrams/pictures as well. We also started using the new Zoom premium features to their full extent, making polls to test their knowledge, and making separate breakout rooms for projects.
In the end, the students learned a lot, and we did as well. They had a blast, breaking out of their past shy shell to be more outgoing with us, and many returned to participate in our other courses as well.
Intro to Design Course:
Now mostly familiar with how to develop and teach, we made the Intro to Design curriculum. Before we started teaching the courses, we made the course strictly about Fusion, but since it was similar to the Advanced CAD course, and we had younger kids from the previous courses who wanted to join this one, we decided to start with TinkerCAD, another application made by Autodesk. We had to familiarize ourselves with it since none of us had ever used it before. Using our knowledge from our WeDo class, and some advice from Mihir, we made the curriculum with lots of demonstrations and projects and made a Google Classroom this time as well.
When the course began, we quickly picked up on how the class would be like. We noticed that some kids were faster in grasping the concepts and made separate breakout rooms for them, having the kids who wanted us to walk them through it or had problems with TinkerCAD in another one. Because of this, we changed the curriculum daily based on the last class. In our past curriculum, before we changed it daily to better suit the student’s progress, we planned to change to Fusion 360 by the third day, but instead, we stuck to TinkerCAD since they were more familiar with it.
Again, by the end of the week, the students learned TinkerCAD thoroughly and had fun, the week’s course being just as successful as the past ones.

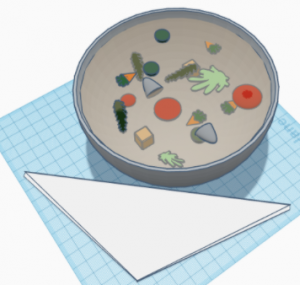
The picture above is of one of the student’s end-of-the course project, using the skills they learned during the course.
Advanced CAD Course:
After the Intro to Design course ended, we needed to change the Advanced CAD course since it was too fast-paced for the returning students. So, we critiqued the curriculum and made it with more pictures/diagrams, demonstrations, simpler projects, adding more projects, and making it easier to understand.
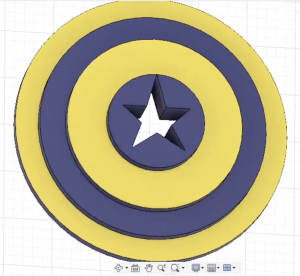
When the course started, it was pretty similar to the past course in the sense where certain students grasped the concepts faster and could make the projects faster as well. Because of this, one teacher would often be in one breakout room supervising them, while 2 other teachers would be in the other breakout room and walk the other students through the concepts and projects, making it more hands-on and interactive, with another teacher checking the progress of both rooms frequently. The picture to the side is an example of one of the students showing the progress of their project in Fusion 360, their own rendition of a Captain America shield.
By the end of the 5 days, the students had learned the fundamentals of Fusion 360 and created impressive projects using the skills they learned while having fun.
Leave A Comment